Showing posts with label Back of House. Show all posts

Monday, March 3, 2014

Laundry Room Overhaul

After living here two years and doing countless other projects like painting the entire exterior I couldn't wait to get my hands on the laundry room.  On the exterior of the laundry room wall was the last part of the exterior to paint. I called it "our hidden shame".  

The outside:
See beautifullness to the right and ugliness to the left?

On the right is original siding and the left is 80's masonite siding.

First up I had to re-paint this mess and add insulation

Before:

After:

Next up and I couldn't wait for this: tear out this horrible 80's, rotting, ant infected masonite siding:


My plans were:
Remove siding
Replace light fixture
Replace the two cheap windows with one vintage window (craigslist find $20)
Replace the door jamb and add replace french door with a vintage door (local salvage shop $75)
Add a stained glass vintage window to the left of the door (craigslist $25)

On the other side of the wall is the laundry room. The plan in there was:
Replace 80's paneling
Re-paint ceiling and walls
Make-over window from laundry room to living room.
Re-place ugly bi-fold door with a vintage screen door (craigslist $30)

Buh bye ugly cheap windows:

They weren't leaving without putting up a fight though:


Rotting door jamb

Rotting masonite siding.

Nasty going down, pretty going up!


Here's my beautiful window!

Framing it out

View from inside

Finger nail injury.  The drill slipped and cracked my nail.  It took months for that to grow out.

We got it in!

We had to replace the door jamb.  Look how disgusting it was.

And a partially rotted sub floor..

My husband had to help with that part.  We cleaned it out then added more wood.

New threshold and our pretty new door jamb installed!

Our vintage door.  I stripped it down to bare wood then re-painted.


Primer


I stripped all the hardware

The window is in, rotting door jamb replaced, hardware re-painted and door hung!

Our vintage window.  I stripped it too.

50's blue under those handles.  I used stripper and went down to bare wood.

Tuesday, January 21, 2014

Laundry Room Reveal: It's Finally Finished!

UPDATE:

I had no idea how popular this post would become and have had several questions. 

First this is how I cut the boards from the panel:

(this is just a stock picture to show what the panels looked like)


When I started looking at the panels I noticed A: the tops are scalloped and B: the bottoms are rotted and C: there's A LOT of nails on the horizontal pieces.  

Using the horizontal pieces as a guide I cut the bottom and top off and only had to worry about getting the nails out of the center.

Yes, they are used as our actual wall.  It is not over drywall. I didn't realize people would think that was odd. Haha!  Our house was built in 1910.  The laundry room was originally a screened in porch. The people who enclosed it put up cheap paneling and no insulation.  So salvaged fence panels was an upgrade!  They are caulked at the seems on the front.  We were able to use a great stuff like material on the back because we were also replacing ugly 80's masonite siding on the outside. We also, of course, added insulation.  It gets very windy here in Texas and I have had no air leakage that I can tell or feel.

Here's what the back looked like:

Back

And when we replaced that siding:

Siding


Also, aside from the fence panel boards there are two different types of siding.  The reason being is when it was built the screened in porch extended through what is now the bathroom.
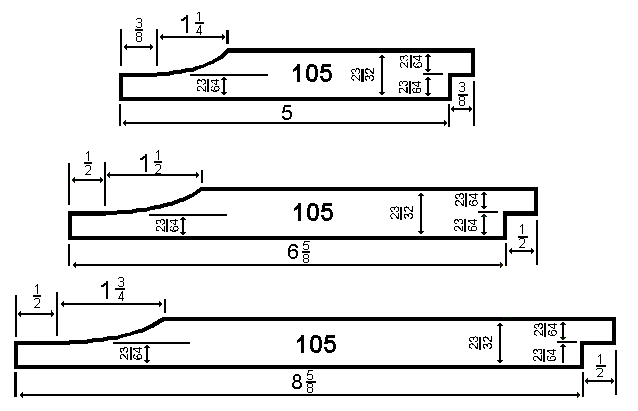
105 6 inch siding was used and this is also what is on the rest of the house except the exterior of the bathroom.

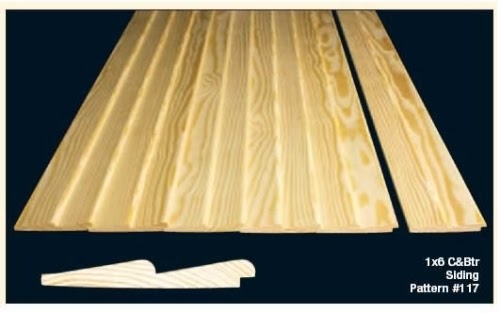
 Sometime in the 20's or 30's that part was made into a bathroom.  105 wood siding was not as popular (from what I've learned) and wasn't as readily available.  117 wood siding was used.


I learned from one of the grand daughter's of the third owner that you went through the screened in porch to the bathroom.  Ha  It was not enclosed until the 80's.

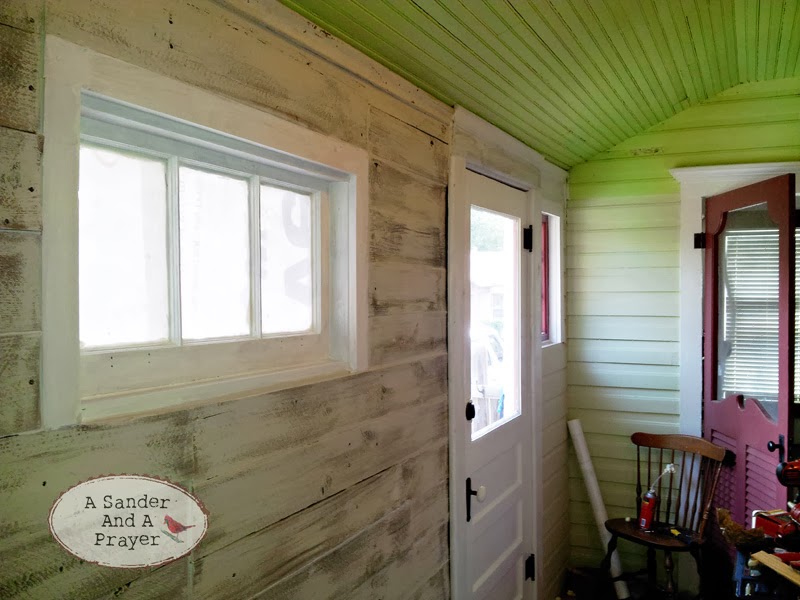
We do have a lot of wood going on in this room from the different sidings to the beadboard ceiling to the fence panel boards.  Somehow it all works and I couldn't be happier with how it all turned out.  My goal was to make it mine but still honor the people who came before me.


It's DONE!


Back in August I blogged this update about the back of our house using fence panels for the wall:
Part One

Let's take a stroll down memory or horrible laundry room lane:

Just for fun here is the MLS picture of this room:


Lime green, 70's paneling and 80s curtains:

This is the only original window left in the house. I wish I had taken a picture of the green blind that was on this.  It looks into our living room and I wanted something to cover it.  I decided on frosted glass spray paint.


The following are some random mid-reno pictures

Our Antique Window


Here's this post about hanging our new old door.

One of the best days of my life was ripping this paneling out.  It wasn't even flush.  It had waves in it and you could push in on it and there was no insulation.

We had old fence panels for the wall and tore out the old windows:


I also wanted some kind of bench to go here to keep stuff off the floor and just have a place to sit to put shoes on.  Luckily in my treasure trove of a shed (the previous owner left us all of his scrap wood) I actually found a bench seat.  I then used the scrap pieces from the columns on the front porch:


This was a fun project for my daughter and I.  We used screws to screw the top into the posts and then spackled the holes. For the stripes, instead of trying to get four pieces of tape perfectly straight I just painted two stripes kind of where I wanted them. Then put one strip of tape down the center of each one and painted the seat.

I also wanted to do something cute with the kids names and give them each a hook.  I just printed out letters, cut the middle out and used it as a stencil:


 I actually feel like this room is mine now:


For the wall I dry brushed it with the Bistro white (the ceiling color) then highlighted it here and there with the wall color (lunar tide).


 I put a rug here for the dogs instead of a doggy bed.  It's just easier to wash.  I wanted a picture of them laying on it but they wouldn't cooperate.  ha


To the left goes to our kitchen and the right goes to our big hallway:


This door goes to the kids bathroom but we're not going to go into that because this is a happy place


This is my 30 dollar craigslist screen door.  Absolutely love it.  Since this was originally a screened in porch I wanted to keep that feel.  It also stops the dogs from going into the kitchen when we don't want them in there.


Colors all by Valspar:
Bistro White, Lunar Tide, Posh Red

 Eventually I want a front loader washer so I can have a counter.  I also want to replace this tile with a hexagon tile. I would also love LOVE to find some vintage cabinets to replace these.  But for now my work here is done.

It kind of feels like this:


"I have exorcised the demons. This house is clear."
(Of lime green paint and 70's siding)

For more posts on our laundry room please visit:
Part One
Hanging Our New Old Door
Our Antique Window


Please, visit my other posts on painting the exterior of our entire house by myself!
http://sanderandprayer.blogspot.com/2014/01/painting-front-june-you-were-hot-sob.html


I'm partying at Remodelaholic this weekend!

Linking to Serenity Now


Funky

http://rainonatinroof.com/2014/02/gmtg-link-party-46/?utm_source=rss&utm_medium=rss&utm_campaign=gmtg-link-party-46

DIY Showoff
So Much Better With Age
Common Ground
Liz Marie Blog
Finding Fabulous
Redoux
Design, Dining And Diapers
Shabby Nest
Jennifer Rizzo
Coastal Charm
http://knickoftimeinteriors.blogspot.com/
Handy Man, Crafty Woman
The Charm Of Home
Beyond The Picket Fence