Saturday, August 17, 2013

Laundry Room: Part 1

The Laundry Room!!  The room that is probably most utilized is the last room to have anything done to it.  That's just how it worked out.

This also ties into the back of our house. 

Ugly, hideous windows. I don't know what the purpose of these windows were other than light.  They were screwed shut.  They also were these flimsy cheap plastic.  It was very strange.


But of course there's real glass in them!  Yeah that happened.

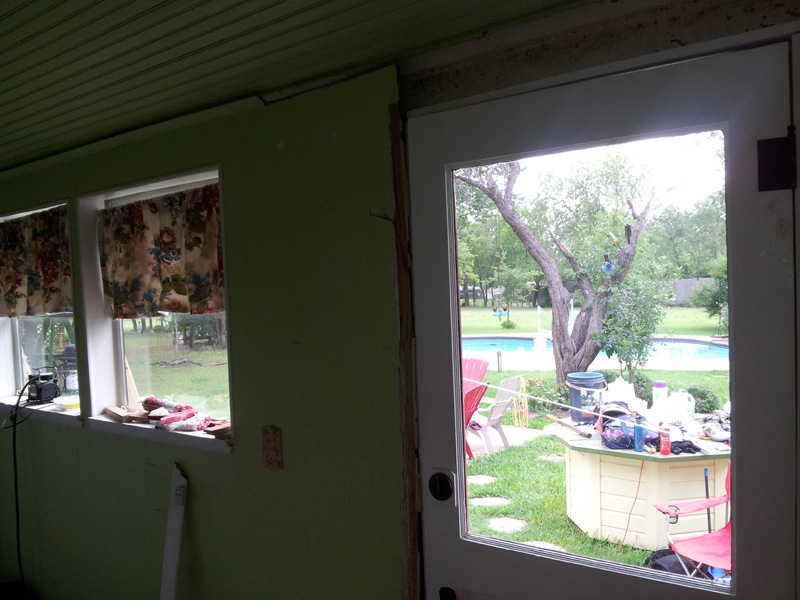
Here's the inside view (pre-broken window).  Ugly painted paneling and NO insulation.


This is our switch to nowhere. We never found out what it went to.

So the plan here was:
1. Take out the old ant infested falling apart siding on the outside
2. Rip out paneling
3. Re-paint
4. Replace windows with one vintage window
5. Take out switch to nowhere

Problem.  The laundry room is all siding because it was a screened in porch.  I just really really didn't want to do sheet rock. If I bought new wood siding it would've been around 200 and I just didn't want to put that much into right now because we also have to buy siding for the outside.  Then I had an epiphany!  I could use the fence panels a neighbor gave me.  

Let me tell you that was difficult by yourself and I have no desire to ever do it again.  That's why when I did Joe's office like this I had the teenager cut them.

The panels were in a big stack in the back yard.  They are also quite heavy.  My first thought was to put it on saw horses but I couldn't lift them.  So I would just pull a panel down off the pile.  Turn it over.  Because these were used and the bottoms were a little rotten and I wanted the tops flush.  I cut the bottoms and the tops off using the boards that the panels were nailed to as guides.  That way I only have to take out nails in the middle.  It was just a little scary using the circular saw on the ground.  Quite honestly I'm surprised I still have all my fingers and toes.

I had found this awesome vintage window for 20 bucks on Craigslist months and months ago.  It needed to be stripped and repainted.  Instead of a heat gun and breaking the glass like I did on the door I just used Klean Strip.


I just love the handles.

50's Blue underneath!


I had to take the old glazing out and apply new.  It's basically puddy that hardens and that is what holds the glass in.

First board:


I tried to stagger them.


Then came time to take out the old windows and install the new old one!


It took some finageling to figure out the top.  I had to take that piece of trim down.  Install another row of boards and re-install the trim over it.


During this time it rained some.  I was in a hurry to put up the house wrap and I accidentally stapled a staple into one of the window panes.  I was very upset.

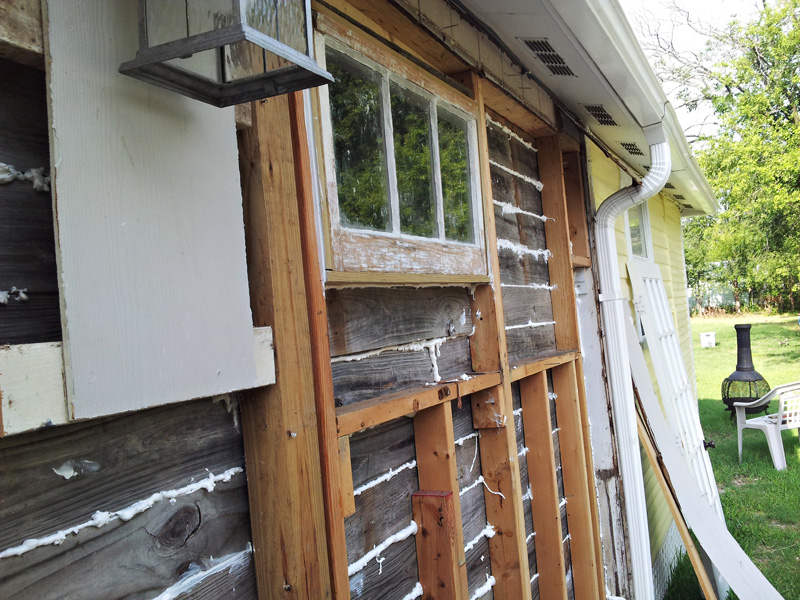
The outside. (obviously no siding yet)

Used great stuff to seal in between the boards.


I painted the handles black like the hinges of the door.


Part two coming soon!

Sunday, August 11, 2013

Hanging Our New Old Door!

    Our laundry room and second bathroom was originally a screened in porch.  When they got plumbing part of it became a bathroom.  A grand daughter of one of the families that lived here said you had to walk through the screened in porch to get to the bathroom.  haha  The best I can tell the other half of the screened porch was eventually enclosed in the 80's.

Here's the french door that was put in:
Inside view (keep in mind this looked nicer when we bought the house. Ha We're mid-renovation here)


Outside View:

It's not bad.  It's just that when you have all of your original doors (exterior and interior) then you have this it just doesn't go with the rest of the house.

Months ago I think in February I ran across this door at the salvage place in Dallas.


I thought I took a full before picture but I guess I didn't.  Oops


It was love at first sight.  It has glass for the top half, the original hinges, original plates and door lock.  I just needed to buy knobs.  Oh and everything I seem to buy has five to ten layers of paint on it.

Yep.  Heat gun...


Which guess what?  I got the heat gun too close to the glass and bam, cracked it.   Fail.

One of the reason to heat gun it:  This is the result of nobody sanding when it was time to repaint!


We also used stripper on part of it.

It sat in the living room for a good month.  We both worked on it off and on.  

Then finally the day came to sand.  Yes!!!


There were also so many holes I had to spackle.  It looked like it had been through several curtain rods!

I also took the hinges and plates and covered them in stripper. It took several coats and scrubbing with a wire brush to get all that paint off.


I spray painted them with black spray paint that has texture.


Then came primer.  The exterior side was going to be red and the interior white.  For the exterior I used a gray primer.  It helps the red go on smoother and fewer coats.


First coat of red.


Now that the door was ready that brought us to our lovely rotting door jamb.  My husband offices from home (See his office makeover here) so when he saw me getting dressed in my demo clothes he seemed concerned.  I told him I'm tearing out the door jamb and I don't need help....

It was pretty bad.  I was able to get the door off, the jamb out and the threshold out after about two miserable hours then I was faced with this:

A rotting subfloor


It only made sense if the jamb was rotten:

(and I'm still sporting that polish on about four of my toes)


I also had this dream of finding hardwood under the tile or some great vintage hexagon tile what I got was two layers of particle board sub floor and this tile that whoever put this in decided it needed to be here FOREVER.  It's not just thin setted in it is cemented in.  That stuff in between the tiles that you would think would be grout is concrete.  This tile isn't going anywhere anytime soon.

So after tears and a why can't anything ever go right pity party Joe came to the rescue:

We got all the rotted stuff out and Joe replaced what we could.  Eventually the whole thing will have to go but for now this is the way it is.  At least that weird smell that we use to blame on the dogs is gone.

Then we got to work on putting in the new door jamb.  There are no pictures of that.  It was miserable, lots of bad words and a few tears. (those were Joe's) I also chiseled out hinges.  That was new and Joe was actually impressed with my chiseling skills.  Finally around 10:30 at night the door was up!


The next day we got the door knobs and dead bolt in and my dad came to put in a new threshold!

(notice the black hinges and door plate)

It's nice to have family in the construction business!


(try to ignore all the construction crap)


I just can't tell you how much I adore this door! It is solid wood.  Very very heavy and only cost 75.00  I paid 20.00 for these vintage door knobs.  With a little elbow grease this door has been restored to it's former glory. (in the words of Nicole Curtis)


Coming up: the laundry room make over!