Saturday, February 23, 2013

Kitchen Reno Part 12: Big Changes!

There's been some big changes!  

Here's Johnathan helping take up the floor.


I'm not going to lie this really sucked.  It wore me out.  The tile was the easy part.  Our floor had a layer of tile and two layers of vinyl on top of a sub floor made out of a masonite material.  It reminded me of what portraits are mounted on.


Termite damage on just about 8 inches of a board.  

For the floor being 103 years old and being covered up for probably 40 to 50 years it's actually in pretty awesome condition.


I don't know why but only part of the floor is painted.  Not sure what that's about.


It appears and I'm guessing probably in the 50's it was covered with these stick down tiles which explains the black marks on the wood.  I thought in the beginning something had scorched it but actually it is the backing of the stick down tiles.

That was confirmed when I took up the floor in the pantry.  That wood is not in as good of condition but I'm still going to try to refinish it.


This part of the subfloor looks like they took a piece of old paneling and used it.  It splintered everywhere.

Probably not a good idea to put a subfloor over FOUR HOLES!

The subfloor and vinyl smelled so bad!

Because most people in 1910 didn't have pantries we have wondered if this started out as a side porch then became a bathroom.  Maybe that's the reason for the holes?  


Did anyone else's grandma have these tiles?  My Grandmother had a grayish blue color just like this.

I also found this vinyl!  What is ironic is it looks like what we had in our first house. What I'm guessing is this was taken up prior to the tile being put down in the kitchen area since it's a later style then country blue and pink flowers.


  Last weekend we finally installed out counters and sink and boy was it a job!


  We had to cut notches so it would fit around our door trim on one side and our window trim on the other side.  It wasn't just straight cuts.  It probably took two hours a side to get it where it would fit just right.


We also had to cut notches so the sink would fit.


We finally get the sink in but it won't go all the way back.  Then Joe has to cut this extra piece of wood out and then it fit.  The hard part was rerouting the plumbing.  The old sink had two bowls.  This is a single bowl.  
Joe made about five trips to Ace Hardware.  It was a long day.

It works!  It took another day and few more bad words but Joe got it done.


My other project was tiling the counters for the new cabinets.  This is my favorite tile.  I just love it.


I haven't grouted yet.  The tile for the edge was actually white and I thought what the heck I'll just spray paint it.  I think it turned out pretty good.

We now have the issue of what to do below the sink.  I'm thinking maybe a little skirt of some sort.


I'm thinking about putting this tile behind the sink.

This door will hang in the door way to the left.  Originally this area was a screened in back porch.  (it's now the laundry room)  I'm going to paint the door the same red as my front door.

We put the big cabinet back where it goes.  I was tired of it being in the way.  We still haven't agreed on a way to hang it that Joe agrees is safe and that I agree looks good.  So for now it's back where it started. (I still have touch ups to do on it)

I had big plans do refinish the floors in the kitchen and dining room this weekend BUT it was my son's 14th birthday!  I was in no mood to deal with the mess of refinishing.  I think we're going to make sure everything is done completely in the kitchen then in a few weeks do the floor.  I need a break!

Wednesday, February 13, 2013

Kitchen Reno Part 11: Help I've Fallen and I Can't Get Up!

I did get up!  Ha 

Before I get to that here's what's been going on:


I started painting the cabinets!  Finally!


Also, I primed and painted the backsplash!!

Primer:


Paint

Once I put on several coats of paint for the cabinets it was time for my new hardware.  This is the fun part.
The above is for the lower cabinets and below is for the drawers:


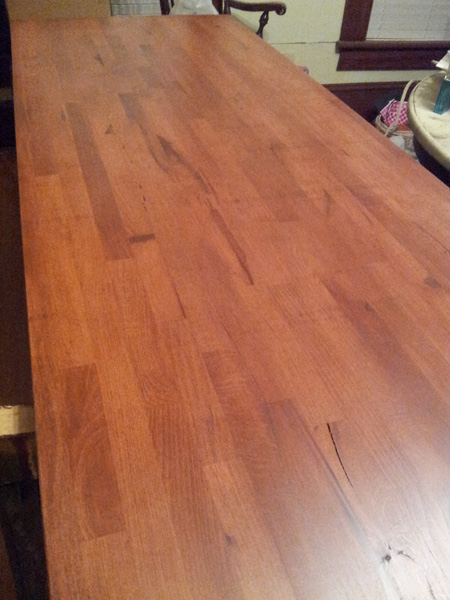
I started staining and sealing the counters!  We will hopefully install these this weekend.

Staining


I let it sit for a few minutes then wiped it off:


I wound up staining it four times:

Victoria helping


After that I used this awesome sealer called Waterlox which is made right here in Texas!


Waterlox is different from polyurethane and somewhat hard to get the hang of.  I applied it with a foam roller then used an old T-shirt to rub it in.

So this past Sunday I decided to do a little touch up paint above the stove.  Well the stove and the cabinets were in the way.  I could have moved the cabinet since it's not secured to the wall yet but hey, that would've been too easy.  I get my ladder next to the stove and have one foot on the ladder and one foot on the cabinet.  Not smart.  The cabinet went forward and I lost it and wind up falling in the middle of the back of the cabinet.

The aftermath:

One of my Facebook friends said all that's missing is the chalk outline of my humiliated body.  Pretty much.

My paint went everywhere.  Victoria was in the kitchen when it happened.  I screamed, she screamed and Joe came flying down the stairs.  She was crying, I was crying, Nicholas was scared and Joe just shook his head.

It took all of us to clean the paint up. It was a brand new quart.  I had just opened it.

Back of the cabinet.
I actually feel lucky I fell on it.  As I was falling I was thinking I'm going to break my tail bone.  So actually the cabinet broke my fall.

Paw prints in the paint.  Sully wouldn't leave me alone while we were cleaning it up.  I think he was worried about me.

I was pretty sure I broke my toe because I could barely walk Monday and Tuesday.  But today it seems better.

This is the back of my leg.  I have bruises like this on my back and my left hip.  I will spare you those pictures.  I'm also pretty sure I have some bruised ribs.  But the show must go on!

I did a little decorating!

It's the cutest little clock!


Then today I returned to the scene of the crime and started taking up the tile.  I wanted to get this part done because I'm renting a sander next week which means everything is going to have to be moved.  This part of the floor is going to be covered up with the cabinets and stove so I don't care if we refinish it. Also getting this part done means I can leave the cabinets and stove in the kitchen while the floor is being refinished.


It's very odd because the black spots have what looks like soot.  Like something scorched it.

And then what would be a renovation without unexpected problems:


This is OLD termite damage.  No live ones thank the Lord.


Which led to Joe having to do his husbandly duty and go under the house and make sure the beams were OK.


I was waiting inside because under the house scares me.


Then I guess Joe decided wait a minute we have a 13 year old...


He sent my little boy under there.  Actually Johnathan loves going under the house for some reason.

Everything wound up being fine.  No damage to the beams and the sub floor just has some surface damage.  So I put a little Great Stuff in there and put the boards back.  Then I measured the part that the stove and cabinets would cover up, sanded and just put a layer of poly on it.


I will work on taking up the rest of the floor tomorrow.  I bought some awesome work gloves.  I'm ready to break them in!