Showing posts with label Living Room. Show all posts

Sunday, March 23, 2014

Living Room Dirt


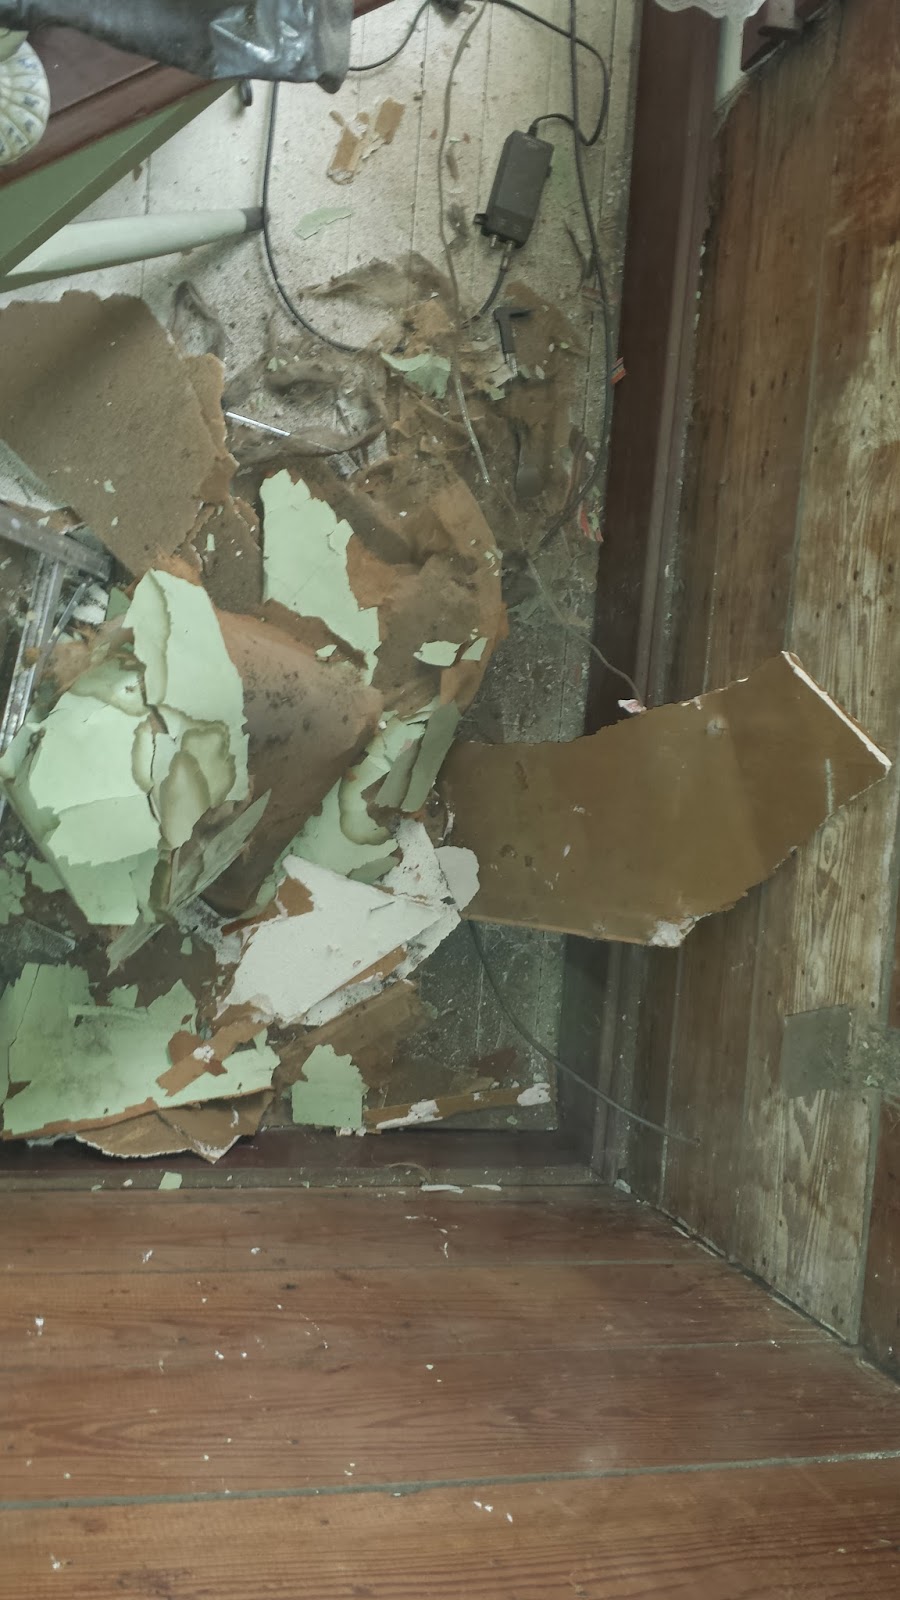
The living room is coming along.  I now have all of the sheetrock down on the walls and ceiling.  I knew it would be messy but I just didn't know how messy.  

In my first post I explained that normally when a house had shiplap boards they were not really made to be seen.  A muslin/cheesecloth type material was nailed with little tacks onto the wall then wallpapered over.  This wallpaper looks like actually someone painted over it.  I'm just going to guess in the 50's or 60's.


Whomp whomp...I found past electrical outlets that left big holes.  

The trash cans were filled many many times.  I'm sure the trash men are cursing my name.

Where there use to be a window

How the wallpaper looked after the sheetrock was down.  In a few places it looked like someone had applied tape over it.

This is what the back looks like


It looks like some type of water damage maybe?


I knew taking down the sheetrock and wallpaper would be the worst on the ceiling but it's one of those things that you know is going to be bad but you're praying it won't be.

So you make your teenage son go first:

The sheetrock itself wasn't as bad. But when the wallpaper was pulled down about 50 years worth of dirt came down too.


It was this really fine black dirt.  The kind that you sweep and sweep and it's still there.  I had to get out the shop vac and do it that way.

The ceiling is in very good condition.  There are spots that have some gaps so I applied Great Stuff to those. 

Primer!  I'm painting the walls white and I'm going to just polyurethane the ceiling.

To fill in the holes I sprayed Great Stuff again and then used wood filler.

I'm almost done painting now!  I can't wait to get my furniture back where it goes. Another project that I can't believe I actually did.  Words cannot describe how disgusting the dirt was.  My daughter wouldn't even go in the living room.  Ha   Final painting pictures coming soon!

Monday, March 10, 2014

Making some headway in the living room!

More like making a total mess. My son is helping some of course him being grounded has worked in my favor. Amazing how fast teenagers work when you tell them they can have their phone back sooner if they help.

Here are some updated pictures. I'm actually trying to post this from my phone because I'm still having computer issues.

Pretty awesome condition considering it's 104 years old.


This is the old wallpaper. 

One of the strangest things I've come across so far. I'm not sure what happened here. The wood itself is in excellent condition. It's like this section was a replacement. On the other side is the bathroom. I think this is where another window had been and they sealed it off when the bathroom was put in. But why the wood looks like that I don't know.


Little piece of the original wallpaper.

An example of the mess we're living with.

Hopefully by the next post my computer will be fixed!

Saturday, March 1, 2014

Inspiration For The Living Room

The last week I've been really sick with a bad cold.  Between being sick, working part time, and running the kids here and there I haven't gotten much done except look on the Internet.

Two of the nicest ladies I have met online gave me some great inspiration.

Kim from Living Vintage has this great photo of her dogtrot breezeway.
I love this for my ceiling if I paint it.


But then there's this picture from a cottage in Arkansas were the boards are left unpainted.

As for how I'm going to do the floor....

Cindy from Glass Slipper Restorations had this picture of her bathroom. Maybe I should do a pattern?


This is also pretty cool.  A painted like rug?


Or random flowers?  From Cutting Edge Stencils

I like the colors in the above picture.  Maybe make a rug with the flowers in the middle?


Or paint and then lightly distress?


Will it look funny with stained baseboards that are refinished?

So these are the things I've been pondering.  

BUT first the drywall has to come down and that's a big job!

Monday, February 24, 2014

Our Living Room: It's going to be a mess


Well, 2014 is turning out to be the year that all our stuff broke.  First we had our water heater go out.  Then it was the power steering in my car.  The kids bathroom has a leak, an xbox mic was eaten by one of our dogs, my husband's windshield now has a big crack in it and the worst part is now my computer is messed up.  None of the USB ports work.  It does not have a place to plug in a wired keyboard.  So, my photo shop is on there, my logos for my photography and the blog are on there not to mention all of my pictures.  

Which brings me to this post.  I wanted to show you the before pictures but they're on the other computer.  I recently took these but had to edit them with a different photo shop. So, I'll try to explain what I've already done and what my plan is over the next couple of months for this room.

Keep in mind I do not claim to be a decorator...


It's somewhat of an odd shaped room.  It's narrow. It's approximately 16x12. With a closet, fireplace, two doors and windows on two walls there's only so many places to put furniture.  I do love our cozy little living room though.

In the above picture and the one below you can see the wall the media console is against.  When we first moved in there was not a wall.  There was a door that went into our daughter's room.  She needed a closet so we built a wall and now the door is her closet door.  

The door below goes out onto the front porch.  We rarely ever use it.


Here is the other side of the room.  On the other side of the window is the laundry room which was originally a screened in porch.  (More about that here Laundry Room Reveal )  You can also see our big hallway through the door on the right.

So here's some of my plans:

Fix this chair properly!

Have a new outlet wired in so cords are not stretched across the back door

Add tile around the fireplace.  I'm thinking maybe penny tile in white or off white.  I haven't decided.  I'm pretty sure this had tile at one point because on the other side is the fireplace in my daughter's room and she still has the original tile.

Here is a close up of what it looks like in front of the fireplace.  Her tile looks like this but of course whole.  ha  It is original to the house so I will not be changing it.  I just need something to blend with it.

Another thing I'm doing, that my husband is not too keen on, is taking down the drywall.  I've done it in another room so I don't know what he's worried about.  ha  Well, except that it is very messy.  When houses had ship lap it was not seen.  Cheesecloth was put over it and then wallpaper.  There are two layers of wall paper under the drywall. From different things I've found in the closet and behind the baseboards it seems this room was wallpapered five times.  I have some remnants.  One is framed and on the mantel.  The others I'm going to frame and group together.

I also plan on taking down the drywall on the ceiling.  Yep.  I haven't decided if I'm going to paint those boards or polyurethane them.

I would not normally ever paint hardwood floors BUT they're already painted.  I found this gray in the oops section for 5 dollars and I thought it might work.  It seems though it's too close to the color of the couch.

Another shot of the floor.  I really can't stand it.

So there you have it.  Our awkward but cozy, soon to be awesome living room.

What I've already done:

  • Built a wall separating my daughter's room and living room and making her a closet.
  • Painted the walls and ceilings (moot point now considering drywall is coming down)
  • Every piece of trim was taken down and refinished
  • Refinished the end table that the previous owners left us
  • Re-painted the media console
  • Added a dog bed/end table

What I'm going to do:

  • Take drywall down on walls and ceiling
  • Would like to take dry wall down on wall/closet and add ship lap instead
  • Paint walls (probably white)
  • Add tile to fireplace
  • Paint the floor
  • Refinish the floral chair

Those are the plans, folks!  Between photography, working part time and being a full time mom of three kids who all play sports I'm not sure how long it will take.  I'm hoping two months.

We'll see....

Monday, February 17, 2014

Pinterest Inspired Dog Bed

If you love Pinterest and you love dogs then you have probably seen this pin:


For her tutorial go here:

I've been wanting to try this for awhile and we needed another end table.  I happen to go into a local thrift store and they had an octagon table for 15 and I thought what the heck.


My Mom had almost this identical table in the 80's.  As my sister reminded me I pushed her into it as a kid and she cut her eye brow open.  (she still has the scar.  Sorry Kelly!)

I took the doors off and then added some spackling to the holes.

The top was in pretty bad shape with a lot of nicks and deep scratches so I used stripper and completely stripped the top.

Next I really wanted to add feet.  I thought it needed a little extra height.  I found some at Lowe's.  
Whomp whomp.  When I got home I realized they would stick out too far if I put them in the edge of the table and the edge seemed too small for the bolt on the end of the feet.  I cut pieces of 2x4 and added them to the side.

I also added some Liquid Nail

Once that dried.  I pre-drilled holes and my husband screwed in the feet.

Next up I primed.  I also stained the feet with Cabot Brown Mahogany.

I used the chalk paint recipe. (4 parts paint to 1 part spackling)
Chalk Paint, Distressing And Sealing For Dummies

I had several samples of green paint left over from previous projects.  I mixed them all together and got this color!  After two coats I lightly distressed then did two coats of polycrylic.  I also used polyurethane on the feet.

I'm not going to lie I had to bribe her with that bone to get in there.  Doesn't she look thrilled?  haha


I'm not sure if this little booger will ever actually use this but it was a fun project and now I have a new end table!

Total Cost:
Table 15
Feet 25
Cushion 12
I had all the other supplies.  I probably spent more on the feet than I should have but I really loved their shape.


For those of you who are wondering what in the heck is going on with our floor:
When we moved in the floors were covered in this office type carpeting.  I ripped it out the day we closed and about 30 minutes before my husband arrived with the U-Haul.
It is the original hardwood and it has been painted several times. (It's also like this in the kids rooms)  I eventually want to re-finish them.  For now though we're saving money to have our kitchen, dining and hallway refinished.  I may just paint over the living room since it's already painted.  It's really starting to get on my nerves!

Linking to these parties:
Dwellings
I Should Be Mopping The Floor
So Much Better With Age