Thursday, January 31, 2013

Kitchen Reno Part 7: Ikea!


I loved Ikea!!  Mom did well and didn't freak out too much since we were going "so far".


Made it home with my new counter tops against my head the whole time but that's OK.


Counters behind me and here is my apron front sink!  I'm so happy!!


Here's a picture I found of how I hope the counters will look after I stain and seal them.  That's also basically the color of my ceiling!


Here is another picture I found of what the sink looks like!


The only thing I really got accomplished today was patching all the holes in the woodwork and I put one more coat of paint on the ceiling.  I think it needs one more and hopefully that'll be it!


Painting tomorrow!!

Wednesday, January 30, 2013

Kitchen Reno Part 6: Kitchen Hell

After Sunday's death wish sanding the ceiling I was not feeling too good on Monday.  I was hoping to have more done by now but this is where I am.

OK, part of Monday and Tuesday I sanded the other walls.


This is the outer wall above the cabinets.

This was actually a little easier because I was able to just scrape this off.  This is usually evidence that somehow moisture at some point got behind there.  This was also the wall on the outside where the paint was just falling off.  Hopefully that issue is fixed now.

Of course scraping it meant it flew everywhere.


Why didn't I use a drop cloth?! Ugh!


Primer!


On to using my trusty heat gun again and stripping the wood work.


Look at that horrible paint!


Stripped!  I will have to fill the holes.  Look at all those nail holes!!  Some came from me taking it down.  The little ones are from different curtain rods over the years.

This is the doorway into the laundry/mud room.  Isn't that door attractive?  It actually looked OK when we moved in.  Then we got Sully and yeah it now looks like this.  We have the original door that went there and it will be going back up.


Soooo, what usually happens I go farther than I was planning and took the top down.  That is blown in insulation.  The laundry room use to be the porch so I'm guessing that's why there's insulation?  Not sure.  Anyway, like the other places in the house I have discovered when the insulation was blown in it blows down whatever was in the walls.

And we have lots of wasp nests.  Empty but still nasty.

Eek!!!  Dirt, leaves and wasp nests.


Stripped, sanded and back up!

My new light fixture above the stove!


Here's what the kitchen looks like right now...


Hell

Tomorrow I'm going to Ikea to get my countertops and new sink!!!  I'm so excited.  I've never been and my mom is going with me.  Considering she usually has a heart attack whenever I drive her anywhere driving for an hour should be interesting.

Sunday, January 27, 2013

Kitchen Reno Part 5: Primer and Paint!

We have primer and paint, people!!

So, it was pretty miserable BUT I'm half way there.

I sanded as best as I could.  Sanding the ceiling was very hard to say the least.  Yeah, not the best picture but I wanted a picture of me in all my misery.


My big goal this weekend was to finish the ceiling.  I knew it would be the hardest and the messiest.  So glad that's over!

PRIMER!!


Remember the holes in the beadboard above the stove?  Joe worked on that today.  After a few fights over why I never put his tools up he cussed his way through this project like a champ and got it done!


So I never ever thought I would paint a wall in my house white.  I love color but there is just something about white bead board. (still have to put the trim back but I can't decide if I should paint it white or green like the ceiling so I 'm waiting.)


I painted the ceiling this subtle green color which matches the dining room.  This will also be the color of my cabinets.  You can see the color better in the above photo.  The bottom photo doesn't show the color as well but it does show what I like to call charachter. That's what you call something that's not perfect and you don't know how to fix it.    I wasn't sure what to do about the little separations. On the wall I caulked them but on the ceiling, well let's face it that would be a pain in the a$$.  But I kind of like it.  It looks like an old house.


Remember the horrible trim around the door?


And....
Ta Da!!


That is Cabot Brown Mahogany.  My favorite stain ever.  It's so rich without being too dark.  I love it!


The wood is just soaking up the paint on the ceiling even though it already has two coats of previous paint.  I already primed it and this is one coat of paint.  It probably needs two more.  I brushed on the primer and first coat of paint to make sure I got in all the nooks and crannies.  The next coat I hopefully can roll on.


On to tomorrow and working on the next wall!!

Thursday, January 24, 2013

Kitchen Reno Part 4: Distraction


Today didn't go exactly as planned.  No primer but it is sanded and hopefully primer will go up tomorrow.  

I thought a pole sander would be a good idea for the ceiling.  I'm not taking all the paint off but it still needs some sanding.  I was already meeting a friend for lunch in Waxahachie so I went to Home Depot.  


It wasn't exactly the miracle thing I was hoping for.  It did OK on the walls but the ceilings are 10 feet high and I just couldn't get a good grip on it.  I can't imagine a short person doing this.


Here's Johnathan helping me out.


What irritated me with this though is that I thought I would be able to take it off the pole and use my extension pole.  Didn't work because it had the screw part on it.  Two screw ends don't work.  That was a wasted twenty bucks.


Walls before sanding:
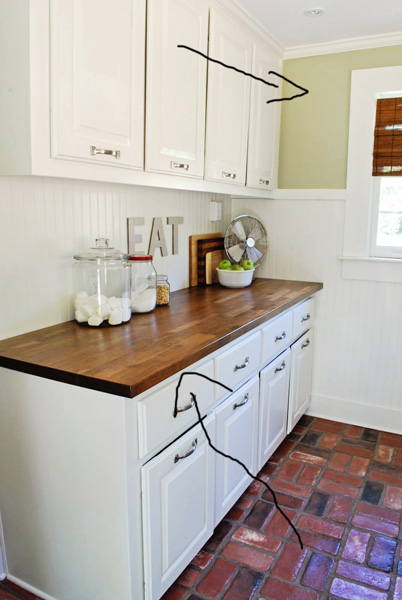

Walls after:

I still have to go over the ridges with a wire brush.


Then I decided to go ahead and tear out this nasty cabinet that was to the left of the stove.
See below:


Under that was this jewel from the 80's:


Blue and pink flowers and mouse poop.


Then I found this!


It is from the cookbook Easy Cut Out Cakes.  It was made by Baker's Coconut in 1973.  What's so funny is that my mom had this same cook book.  She didn't bake much but she made this cake every Easter.  How crazy is this?  So I looked it up on Ebay and someone was selling it so I bought it!!  Mom never knew what happened to hers.  She also made a Raggidy Ann cake from this book for my 1st birthday so I told her it would be cute if she made me one for my 40th in September.  Ha

My other distraction today was this termite damage.  Luckily it's old but I never knew termites made there home with dirt.  It's this sandy, clumpy dirt at the top.  I kept trying to sweep it out and would not come clean so how am I supposed to paint this and oh yeah, why don't we have a vent hood?  (See how I get distracted?)


Which then led to this:


So I took a piece of the bead board down which was not easy.  Bead board is tongue and groove.  It's locked in.

There's dirt all behind about a three foot across area:


AND there is no vent behind there.  Where is it?  Why was it taken out?  Why didn't anyone put one back in?  I guess that's a mystery I won't solve.  So what to do?  Are we going to add one?  Not at this time.  I know the people who lived here before me lived here 7 years and did just fine.  We'll figure that out later...

My other distraction is that on this wall is a door frame that goes into the dining room.  Then I start thinking I should probably finish stripping that:
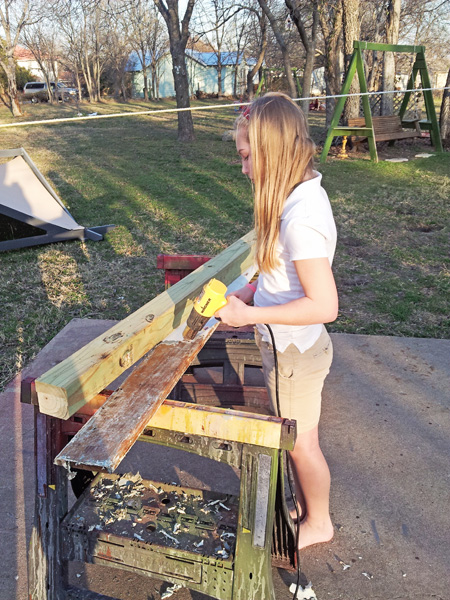

Victoria helping


I took off one of the boards and I mean seriously did it really need 15 nails to hold it up?  One of the reasons I took it off is because when you are trying to go from 8 layers of paint back to bare wood and stain it, it is very difficult.  Lots of stripping and sanding.  I tried to get the other side off but it's apparently attached to a piece of the bead board and I can't get it off without messing it up and I've done enough damage today.


So, I'm covered in dust and my nails have never looked worse.  That's dust and dirt.  So nasty.


And here's my sweet Sprite.  She didn't get anything on her she's just so cute.


Tomorrow I prime!