Sunday, February 9, 2014

Check Out My Friend Releasing Her First Single!

This is my friend Cheryl Nifong.  I've known her since elementary school!  She's releasing her first single, a Christian worship song.  Cheryl is so talented. Not only does she play the piano on the single she also wrote the song herself.

Check it out!!


(I did the photography)

Also check out her Facebook page and give her a like!

Thursday, February 6, 2014

Building a Faux Fireplace Mantel

Before I go any further I have to give credit where credit is due.  I found this plan on one of my hero's blogs.
The amazing Anna White.
Her plan was totally my inspiration.

My faux mantel was going to be used as a photography prop with mostly children so I didn't want it too tall.  Also, when I was done using it I was going to put it in our master bedroom which is an attic conversion and has sloped walls. I had to change the measurements.

So, one, two, three faux (sorry, couldn't help it) I went shopping in my salvaged wood pile.


I had 4x4's from the old fence panels that I referred to in this post:
Laundry Room Reveal

I'm not very good with a list of cuts and measurements.  I'm a visual person and that is the aspect I'm taking in explaining this.  If you're more of a technical person please follow the link to Ana's plan.  Ha

These measurements are in length.  The entire mantel measures 44 1/2 inches tall and 45 inches across (that includes the over hang on each side)

Next is the order in which I put everything together:


You do have to drill at an angle on the back.  It is also a good idea to add some wood glue before screwing the pieces together.  The last thing to do is the backing.  I used bead board paneling.  I bought it at Home Depot and had them cut it for me.  The back measured 44 1/2 inches tall and 41 1/2 inches across.  I used little screws about every inch.

And here it is!  This was my photography background for pictures!


Again, I want to say I am not an expert.  I am not a carpenter.  This is just the way I did it.  Create at your own risk!  Haha!


Linking to these parties:
Serenity Now Blog
French Country Cottage
My Repurposed Life
Remodelaholic
Elizabeth & Co.

Monday, February 3, 2014

Guilt: The Mother's Favorite Demon

Most moms I know would do anything to help their kids succeed in school and life. We worry, we pray, we yell, we scream, we try the soft touch, we try the grounding, we try to have "conversations", we try lectures and when nothing works we feel guilt.  We beat ourselves up over and over again that maybe if we had just said this, whatever "this" might be, that would have changed everything.  So we go back to our child with basically "And another thing..." statement.  Did that make him change?  Did it help at all?  More than likely not.  What it more than likely did do, however, was reinforce our kids impression of us that well, we're crazy.  That all she does is yell and criticize and instead of inspiring them to change we're making them feel that they never will.

Both of my sons have now been diagnosed with ADD.  Now I feel guilt over what I fear other people are thinking such as, oh she couldn't control her kid now she's medicating him, I hope she doesn't think that's a magic bullet, or sure when all else fails, medicate, that's what lesser moms do, and the one I secretly fear the most, she should have done this a long time ago.

Guilt is the mom's frenemy. We hate the guilt but we hold on to it, we feed it, it becomes our ever faithful companion because to feel guilt means we're doing something.  To not feel it means we don't care about our child.  

I came to a realization not that long ago that I am an imperfect person trying to raise a perfect child.  Our children have their own story to write.  We're just the caretakers of the book.  Everything that they will experience from the accomplishments to the disappointments will make them into the person they will become.  My favorite Dr. Sears quote "Parents should not take all the credit or all the blame for who their child later becomes. You do your best to raise your children with all tools and resources you have at that time. At some point it's up to the child."

What little I actually know after 15 years of parenting is this:
-If I have hurt my child I try to apologize
-Drop to your knees and pray every day
-I have a responsibility to God above everything and everyone to try to do the best I can and to keep trying because I am not perfect and never will be and neither are my children and it's OK.

What I hope they know:
-Actions have consequences
-God's love is filled with grace
-Drop to your knees and pray every day

My prayer is that when they're grown we can laugh about the dumb things we both did.


Sunday, February 2, 2014

Painting The West Side Of The House

Our West Side Story
(sorry, too easy)

There's no way around it.  I was HOT.  I did most of the work in the morning.  Once the sun started coming over the house I was done.

Here is a close up of what the siding looked like.  The paint was just falling off. It would seem easy to prep right?  Somehow this took me all of July.  But the kids were home and I couldn't exactly ignore them all day.  I basically worked on this about three to four hours in the morning.  Occasionally in the evening when the sun went down.  This side I was really worried about.  I did a lot of googling and most everything I read was that this type of peeling usually means there was moisture behind the siding. The caulk between each board was also falling down. I'm hoping maybe that was the cause of the moisture. From what I've been told it had last been painted between 10 to 12 years before. I took off some random pieces of siding here and there and no mold or anything.   It has been a year and a half and so far no signs of peeling.


Getting up and down the ladder was the worst part.  I credit it with giving me Bursitis in my right hip.  It's hard to describe how disgusting I was every day.  If you've ever used a paint scraper on old paint then you know.  When I would put the paint scraper on the siding I used both hands, one on the handle and one on the little handle at the top.  I would bare down and well, scrape.  When you do that all of that paint and dust come up and basically hit you in the face and chest.  I would come inside and see specs of paint in my eyes, embedded in my scalp (should've worn a cap) and covering my arms. On top of that I had the dust from sanding all over me.  A lot of times I would jump in the pool which my husband would then blame our micro particle problem on me.  Haha


I wish I could say I was Wonder Woman and forged ahead diligently.  I did forge ahead but occasionally with tears and feeling overwhelmed.  BUT I knew there was no way I was giving up. This was me saving 100 year old siding. This was my marathon.  This was me proving something to myself. (which after this I no longer feel the need to do. Ha)

I got to where I couldn't stand to even move the ladder.  I would get my oldest son out there and have him move it for me.

I went through two sanders during this time period and around 150 pieces of sandpaper. As I got one section sanded, I primed.  I went down to bare wood on almost every board so I wanted it painted as soon as possible.  It's supposed to take the paint better than if I let it sit. And boy did it soak it up!


I don't even know how much caulk I went through.  There were a few big gaps in between boards.  For those places I sprayed Great Stuff then caulked over it.

If you can imagine there is a street running along this side of the house.  So, yeah, I got quite a few comments, honks, a few thumbs up, occasionally a whistle or two, it was somewhat entertaining.  Ha  I also got A LOT of compliments and people saying how much they just enjoy driving by and seeing the progress.  It really did help me keep going.


Primer!

See those circles at the top?  Blown in insulation was added at some point and they cut holes at the top to blow it in. Why they just didn't take off the top piece of siding I don't know.

I just want you to imagine caulking underneath EVERY. SINGLE. BOARD.  No wonder it took so long!

I gave Victoria the honor of the first stroke of yellow.

After all the hell of scraping and sanding there is nothing more satisfying than seeing the paint go on.


The bottom board was painted white because we were putting up white lattice.  Do you spot the cat?  That little booger was living under the house.  He drove our dogs nuts!

"WHAT? A second coat and you want me to smile in this picture?"

I do have to hand it to her.  She helped more on this side.  She didn't like the scraping and sanding (how can I blame her?) but the painting was OK.

Just some advice, don't ever try to open a can with a knife.  I'm sure you smart people out there already knew that.  I tried to break the seal of a can of brush cleaner, it slipped and I stabbed myself right in between the  thumb and my finger.  My husband took me to the ER and I got stitches.  You wouldn't think it would bleed that bad but when we got back I realized our house looked like a crime scene.  Haha


Sooooo...Before:

After:

The day I finished: July 26, 2012 My Facebook status "I'm going to go take pictures of the house now that it's painted.  Although I did stab myself with a knife on what was supposed to be the last day of painting the miracle is that I never fell off the ladder."

A year and half later it still looks good:


This picture pretty much summed up my entire July:

For my posts on painting the exterior of our house please visit:
Part One
The Front
Rotted siding and injuries
Hot June
The Front Door
The Front Peak

Linking to:
DIY Showoff
Remodelaholic


HI!  Please, leave a comment and let me know how you found me!

Thursday, January 30, 2014

Stripping and Painting the Front Door

The next thing to do to complete the front was painting the front door.

This is what it looked like the day we saw the house for the first time. Not very impressive.  The door itself was in good condition but the paint jobs through the years had done a number on it.  It was very lumpy, paint drips and then obviously it needed a second coat.  As far as I know this door and our door on the side of the house are original.


I got to work and what started out as me just doing some sanding to even things up turned into me completely stripping the door.

Don't be fooled by the smile. This is the look of "what in the hell did I get myself into but I'm going to act like I know what I'm doing?"


It took about three days.  I used stripper on all of it and used tooth picks to get into the detail work. It was also the end of June.  Hot.

After stripping and sanding here's what I had:  A beautiful door ready for it's proper paint job. (the other side is stained. I recently re-did it. More on that later)


After priming and the first coat..


After the second coat...

I was actually not thrilled how this turned out.  The side door looked good with the color:

The bullseyes looked great:


What the what what happened?


In the picture above it actually looks more salmon which it wasn't but it seemed to have a mauve tint to it.  I left it because I needed to move on to the West side of the house.

That was until today!

I found the most beautiful red when I restored the laundry room:
Laundry Room Reveal

It's Posh Red by Valspar


Remember how the door's doorknobs were ugly and the deadbolt stuck out like a sore thumb?


I used this awesome spray paint:

Rustoleum Oil Rubbed Bronze


The view from the outside

So happy that's done!!

Now excuse me while I celebrate finding the perfect red with an adult beverage and Little Red Corvette cranked up!

For more details on my exterior painting project please visit these posts:
Part One
Part Two
Part Three
Part Four


I joined a party at
My Romantic Home

Linking to:
Mod Vintage Life
DIY Showoff

Saturday, January 25, 2014

Painting The Front! June, you were a hot SOB

June was not my friend.  Totally my fault though because I should have started on the front in February or March.

This was one of the forecasts and actually for Texas it isn't THAT bad.


One of my FB status' was:

I have paint in my hair, a pulled muscle in my neck and shoulder, a possible hairline fracture where I got hit from the baseball and busted up knuckles and knees from working on the house. This woman is going to go take a nap. The kids are old enough to fend for themselves!

I slowly made my way around the porch.  With it being somewhat of a Victorian style home I wanted three color combinations.  I already had the yellow then went with a light green and a red.


The green that is on this door was painted by the previous owners and it was too dark for  what I wanted.

Notice all the dust and trash.  Boy was this a mess.


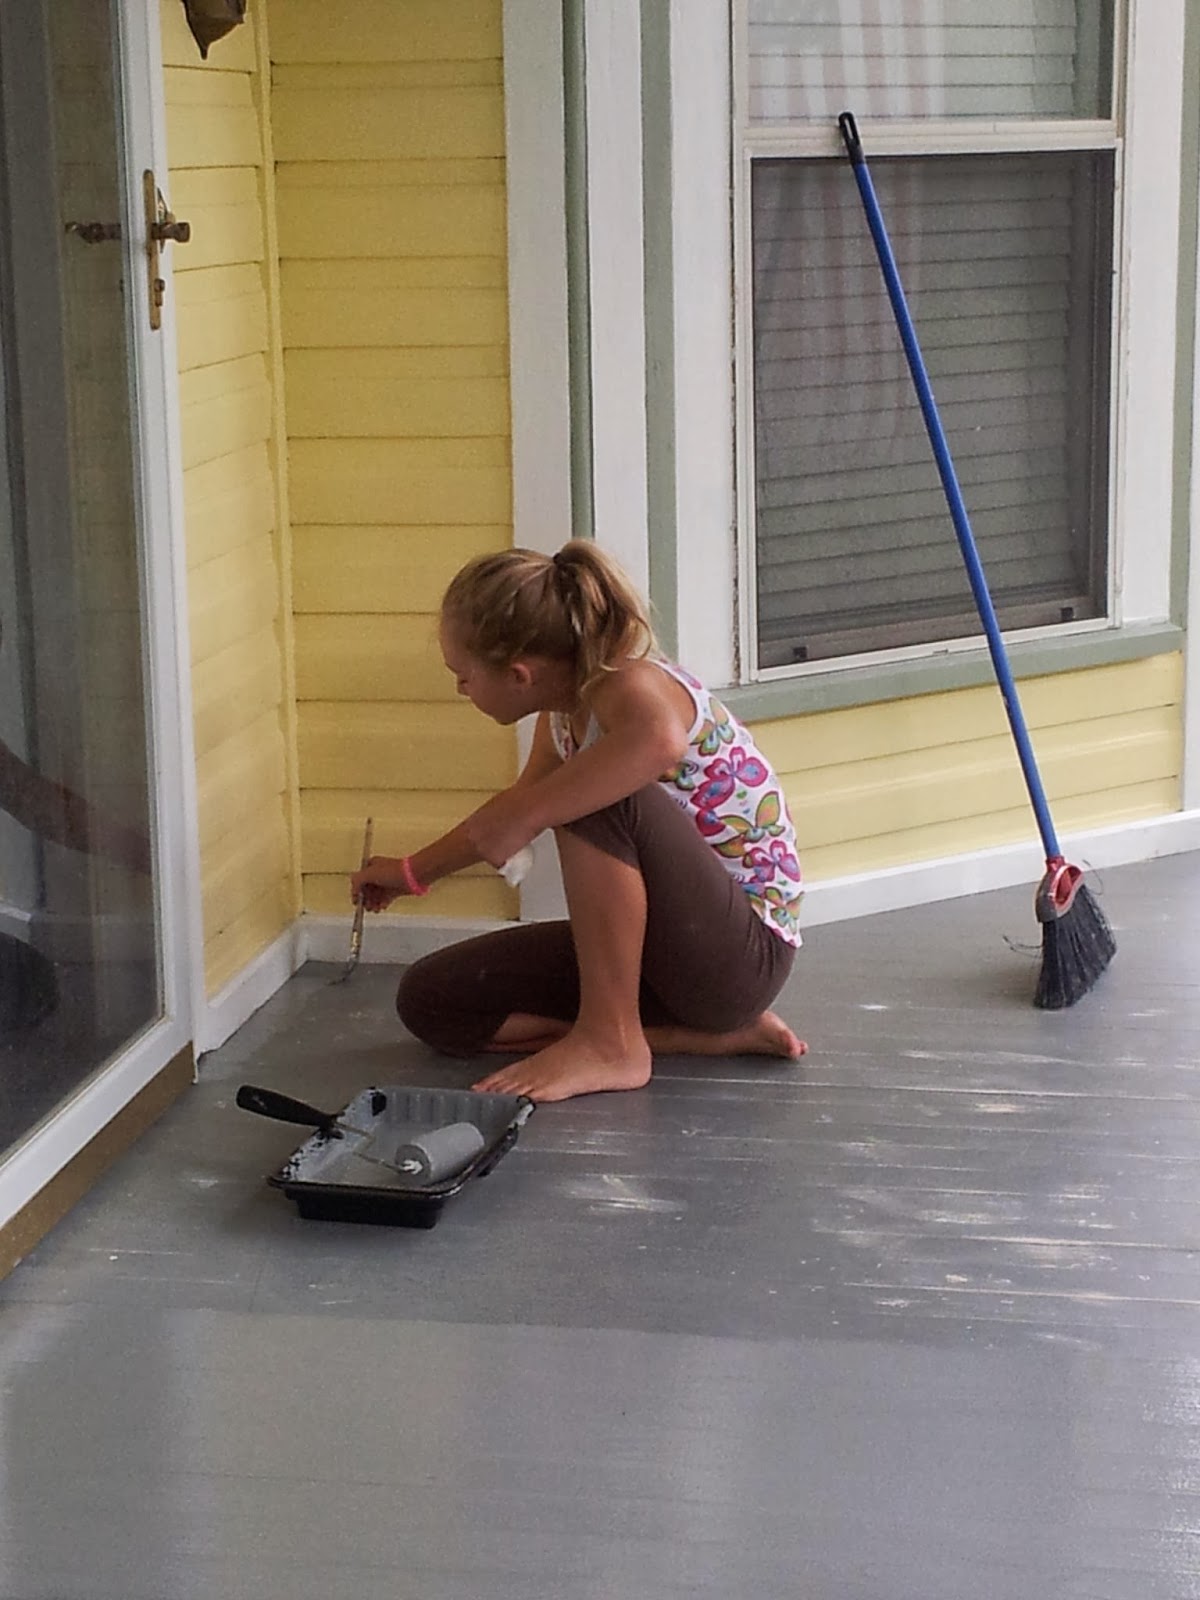
I wouldn't say I'm always a detail person.  Well, I would never say I'm a detail person but this porch brought it out in me.  This is my daughter helping paint the side of the trim.


This is what happens when you're working in temps that are in the hundreds.  You jump in the pool with your clothes on and on occasion with your phone in your pocket.  Still hurts...


After getting the porch walls painted I had this to deal with:


The bullseyes aren't original but they were put on sometime in the 50's or 60's.  I debated whether or not to keep them.  Then I decided to paint them red.  It turned out great.


Me in all my glory

I really had to get a grip and conquer my fear of heights.  I had to get on the roof.  There was no way around it.  I wish I could say I was like this:

But I was actually like this:

Trim and bullseyes painted!

I still had the top to contend with  but it was really really high and I had to work up some courage for that one.

The next thing to conquer was the porch ceiling.  Like with a lot of old homes the custom is to have porch ceilings painted blue.  Some say it's supposed to ward off evil spirits.  More practically it is said to fool yellow jackets and mud daubers from building nests because they think it's the sky.  For the most part it seems to work.

The following pictures are actually from the day we first looked at the house.  This will give you an idea of how bad it was.  No one could tell me when that ceiling had last been painted.  Unlike the siding which had layers upon layers of paint this seemed to only have about two.  When I touched some parts of the boards the paint just seemed to disintegrate although the wood itself was basically in excellent condition.


 God seriously smiled upon me one day in Lowe's.  I walked in and went straight to the oops section in the paint department like I always do.  Before my eyes sat two cans of blue porch paint for five dollars each.  They were two different shades so I bought a paint bucket and mixed them together.  


My FB status after:

"Porch ceiling PAINTED.  It only took a coat of primer, a coat rolled on, a coat brushed on, pulled muscles in my neck and an aching back.  But it looks so pretty."


The next step was to re-paint the porch floor.  Between the dust, paint splatters, scrapes and everything in between it was a mess.


I know it looks like Victoria is a very hard worker.  And she is.  For about 30 minutes but I'll take it.


Paint colors:

Snowcap White Valspar
Flax Olympic
Cooper Montera Valspar
Green Tea Leaves Valspar

Other posts related to painting the front of our home:

Part One

Part Two

Part Three